Sunday, November 11, 2012

The friendship star pillow cover for friends!

Can you believe Thanksgiving is right around the corner? That means Christmas will be here in a flash. So it's time to find the time for gift making. A lot of my gifts go unappreciated but there are those few occasions when I made something special for someone and I knew they really treasure it... those are the times it's all worth it.

I was thinking of sharing some of this years gifts that are ready for giving, then I remembered this is a public blog and that would take away all the surprise :)

Instead I'll share with you a class I taught last night to some friends in my church.

 I demonstrated the friendship star block and how to  made it into a pillow cover for a decorative throw pillow.
This is the block I taught. It was fun to be presenting to good friends. I could really joke around and enjoy myself. I like teaching... but I really like hangin' out with my friends and sharing what I love with them.


One of the lucky ladies walked away with the above kit. Everything she needed to make the pillow cover except for the thread.


Here's the finished product... drum roll please:

As you can tell this last picture is different fabric than the first, which shows how versatile the friendship star can be!


Happy Holidays

Saturday, October 6, 2012

Does that make fall the season of friendship?

This morning I woke up to a cool crispness I have been waiting for! Yeah fall is here! I live close enough to the mountains that I can see all the colors. I love the colors of fall. They are calming and warm looking. And orange... the color of friendship. Does that make fall the season of friendship? I guess it is the time I start thinking about my friends and family and something meaningful to do for them for the Christmas Holiday.

Today I am feeling thankful. Thankful for the cooler weather. Thankful for the colors of fall. Thankful for my family and friends that mean so much to me. I am thankful for the season of harvest that is slowly coming to a close. Thankful that the last thing I need to can is grape jelly for this season. I am thankful for the blessing that  I have to work on things that I love IE; helping at the elementary school, quilting, curtains, gardening, and attending the Temple. Does life get any better than that? Spending my days doing what I love!

I am sending my best wishes and prosperity into the universe. I hope that others will be able to find a way to be happy and find joy in the everyday things that can feel so mundane. Yes even in laundry. For me that would be finding the joy in the colors and texture of the fabrics. The smell of fresh cloths. The warmth as they come out of the dryer. That warm feeling makes me want to grab a cup of hot chocolate and snuggle in a fuzzy blanket and spend the day with a good book :)

Here's to You and Yours!

Friday, September 14, 2012

I Opened an Etsy Shop... YEAH!

I took the plunge, started a business and opened an Etsy shop! I'm so excited I wanted to share with you some of my work :)


This first one is one of my favs! the fabrics are awesome, the colors are exciting, and the movement of the pattern draws you in. When I made this quilt I was thinking about a teenager,but many of my friends (being a more mature audiance) were stunned by the out come.


This next one I made to teach a class about half square triangles. I need to find the minature, I know it's around here somewhere. I love the half square triangle. It has such versitilty. If you're looking for one square to learn, this would be it!


The last quilt I added to date is "Fly Away Home." I was trying out a new technique to make flying geese. It was so fun I couldn't stop!


Watch for a later post. I plan to give instructions for both half square triangles and flying geese. Maybe they'll be your new favorite technique. 


Friday, August 31, 2012

Refinish your old Kitchen Stool into a Trendy Accessory

I found two Kitchen Stools for $7 at a local yard sale.What a deal. With a little bit of sandpaper and paint they look like new!
Before
After


This Tutorial will show you how to add the paint to the legs. You can find the instructions to add the fabric on the Riley Blake Fabrics Cutting Corners.

Supplies:

  • Kitchen stool (as many as you would like)
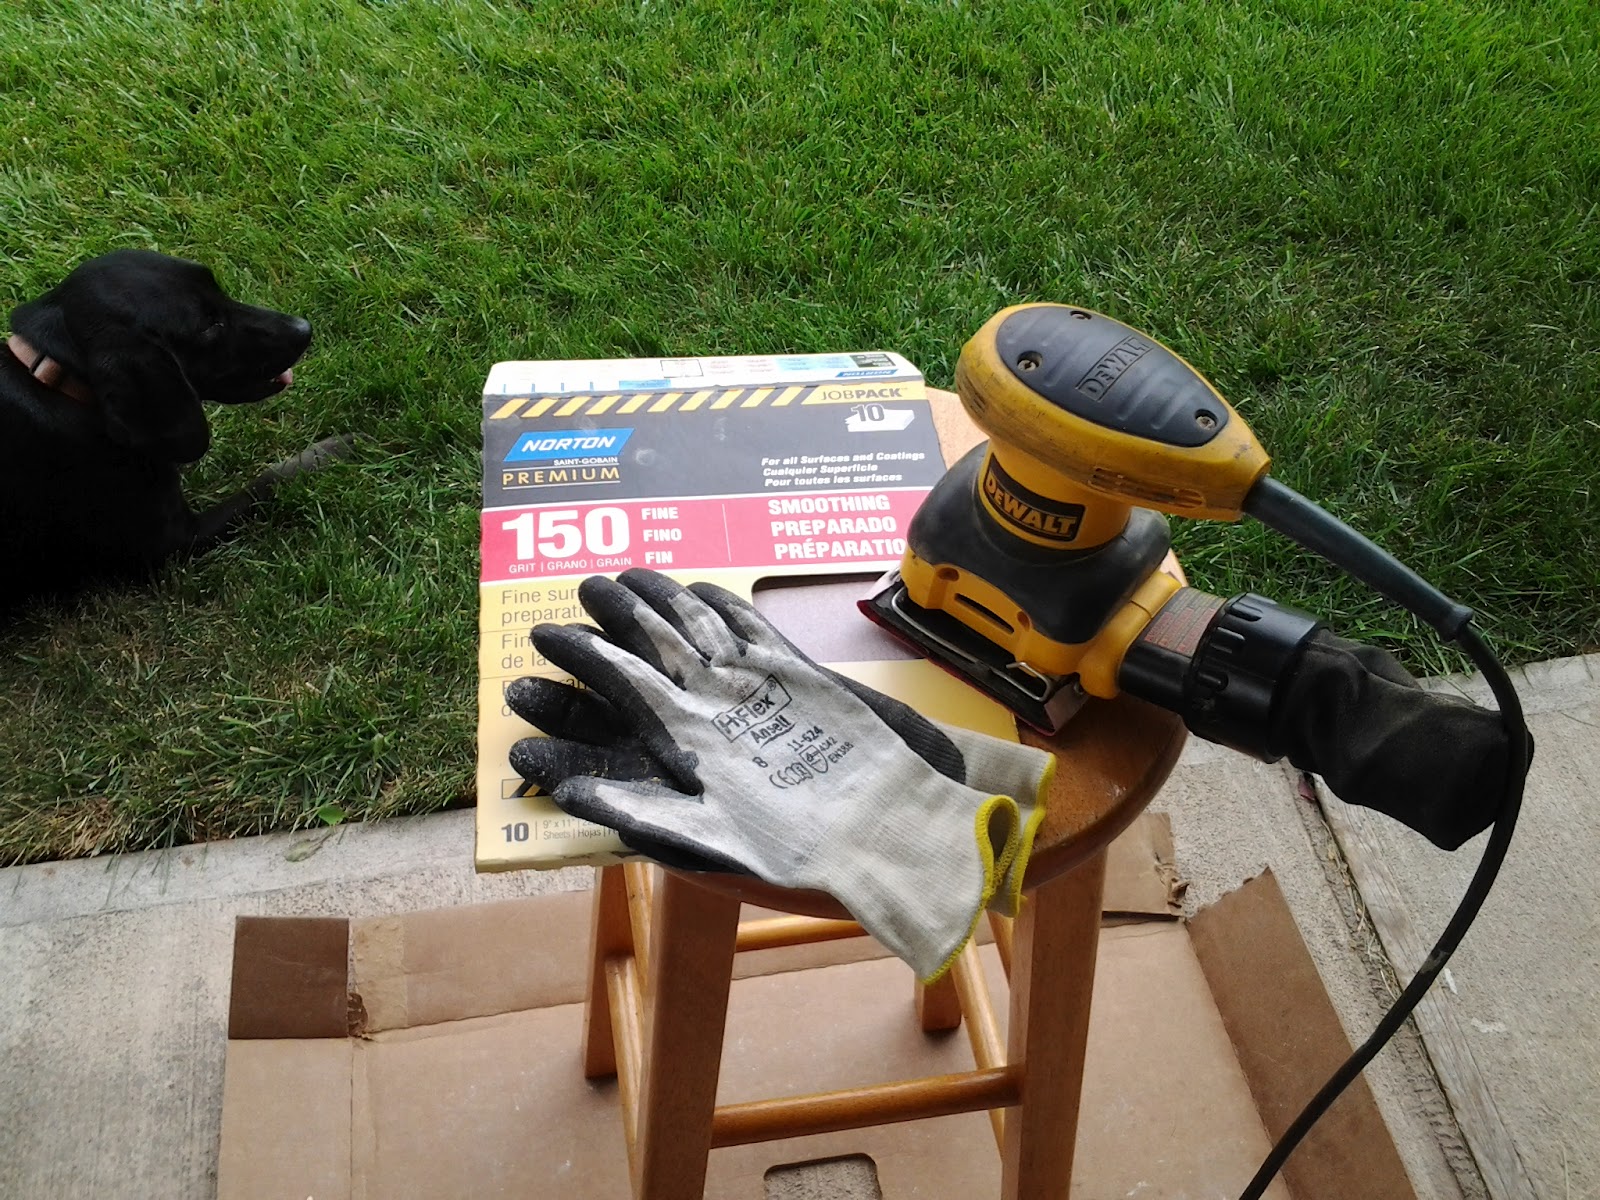
  • Sander
  • Protective Gloves
  • Paintbrush
  • Paint (I like the kind that has the primer included)
  • Lacquer (I didn't add this step to the instructions because I used  a brand I don't like but that that I needed to use up)
  • Something to protect your surface
  • Blocks to lift your kitchen stool will help keep it clean (I used a milk crate)
Having a companion can make the time pass faster :)


It makes it easier to paint if you sand the finish off the stool. Having the surface protected will keep the area cleaner, it also keeps the stool from getting scratched.


Make sure to wipe as much of the dust off the wood as you can. This dust will get in the way of the paint adhering to the wood properly. Plus it makes a mess everywhere. I will sweep my area just to make sure that pesky dust doesn't stick around.


Starting at the bottom paint the legs and insides first. Include the bottom of the seat. After the first coat of paint dried I went back to look for spots I missed.

There you have it! Your done.
Adding the fabric is easy! 


Thursday, August 2, 2012

Silly Me!

I just realized I didn't post a picture of my finished lunch bags
Here it is...
Here's to a new  school year!


Saturday, July 28, 2012

Reusable Lunch Bag- Riley Blake Laminates

This DIY project uses the Riley Blake Laminates. They are easy to sew, and can be easily wiped down with a wet cloth.
Materials:
Cut 1: 12.5" X 20" for outer bag
Cut 1: 12.5" X 20" for lining

Cut 1: 2" X 12.5" for outer bag
Cut 1: 2" X 12.5" for lining

Fold the outer bag and lining in half with right sides together. They should measure 12.5" X 10" each.
Sew up all four sides using .25" seam allowance.

Refold fabric with rightsides together, with seam allowance touching.
Using a ruler measure 1.75" from the point draw a line.

Using the line as a guide sew along the drawn line.
Trim away corner, leaving a .25" seam allowance.

Turn outer bag rightside out. Slide the lining into outer bag, wrongsides together.

Matching seam lines, sew around the top of the bag about .5" from the top.
trim excess fabric with pinking sheers to .25" from sewn line

With wrong sides together topstich the outer bag strap and the lining strap.
Use pinking sheers to trim away excess fabric on both sides of the sewing line.

Pinch the top of the bag opening about 1.5" in and insert strap. Pin in place then sew into place.

Thanks for checking out my blog! You can find the instructions for the upright back on RileyBlake.com Select the Cutting Corners tab, after July 30, 2012

Tuesday, July 3, 2012

New Mexico Fire :-(

I was asked to make this quilt for a friend who lost half their home, two out buildings, and an antique truck in the New Mexico fire last month.
My oldest daughter helped choose the fabrics. I think she has the eye for color!


Next week I'll get together with some friends from the same ward and quilt it! Watch for the finished project.

My heart and prayers goes out to all those who are fighting the forest fires in the surrounding areas! Thank you for helping keep us and our homes safe.