Saturday, July 28, 2012

Reusable Lunch Bag- Riley Blake Laminates

This DIY project uses the Riley Blake Laminates. They are easy to sew, and can be easily wiped down with a wet cloth.
Materials:
Cut 1: 12.5" X 20" for outer bag
Cut 1: 12.5" X 20" for lining

Cut 1: 2" X 12.5" for outer bag
Cut 1: 2" X 12.5" for lining

Fold the outer bag and lining in half with right sides together. They should measure 12.5" X 10" each.
Sew up all four sides using .25" seam allowance.

Refold fabric with rightsides together, with seam allowance touching.
Using a ruler measure 1.75" from the point draw a line.

Using the line as a guide sew along the drawn line.
Trim away corner, leaving a .25" seam allowance.

Turn outer bag rightside out. Slide the lining into outer bag, wrongsides together.

Matching seam lines, sew around the top of the bag about .5" from the top.
trim excess fabric with pinking sheers to .25" from sewn line

With wrong sides together topstich the outer bag strap and the lining strap.
Use pinking sheers to trim away excess fabric on both sides of the sewing line.

Pinch the top of the bag opening about 1.5" in and insert strap. Pin in place then sew into place.

Thanks for checking out my blog! You can find the instructions for the upright back on RileyBlake.com Select the Cutting Corners tab, after July 30, 2012

Tuesday, July 3, 2012

New Mexico Fire :-(

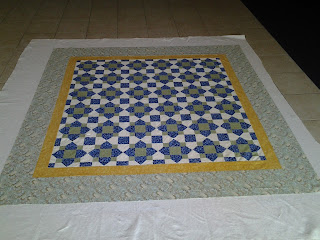
I was asked to make this quilt for a friend who lost half their home, two out buildings, and an antique truck in the New Mexico fire last month.
My oldest daughter helped choose the fabrics. I think she has the eye for color!


Next week I'll get together with some friends from the same ward and quilt it! Watch for the finished project.

My heart and prayers goes out to all those who are fighting the forest fires in the surrounding areas! Thank you for helping keep us and our homes safe.

Sunday, June 10, 2012

blood sweat and a few tears

I made this quilt for a friend who recently moved. Because it was a surprise, I couldn't post it till now. What is not shown on the picture is that each of the white pieces of fabric were signed by friends who will l miss her and her family.
The yellow "sun" circle says,"may the sunlight of faith ever warm your heart" -Gordon B. Hinckley-

The best part of the project is the tear of gratitude my friend gave to me. It's that sort of feeling that makes the time and effort of quilting worth it!

Sunday, April 29, 2012

Crayon Art

I tried my hand at crayon art.


I didn't add instructions for this because you can find them almost anywhere by searching crayon art. But this second example was my idea...


This one I set the canvas flat on the floor. I held the crayon over the canvas. When I hit the crayon with the blowdryer the wax dripped onto the canvas. Then using a swirl motion with the toward the canvas.


Even more... My eldest daughter made a sample,

I love the energy she has captured!


Saturday, April 21, 2012

Exciting Preview!

I have been feverishly working to be ready for my RileyBlake tutorial. Today I will spend some time scrubbing my article. On Monday it will be published! I am adding a preview picture of the quilt in a secondary colorway.
 

Monday, February 6, 2012

Sheepie and Bear

I have some exciting news! I have been accepted to design and present a tutorial for Riley Blake Designs. A little of what's to come...
I am using these fabrics to make two twin size quilts for my teenage daughters. Once the quilts are done we're planning on a bedroom makeover. Looking at the fabric gets me excited to sew. The tutorial should be coming out in the middle of March.
Because I love to look at the pictures on Blogs, I find that my Blog is mostly pictures. I wanted to add one more. In an earlier post I had a cute little bunny. I had so much fun with it I needed to make more. Here's what I did...
I used the Bunny Hill Designs: Baby Bear and Lollipop. Quick and fun! They also made some really great gifts for some younger girls in the neighborhood.

Thursday, January 26, 2012

Christmas is past... but the gifts remain.

I made these gifts for my youngest daughter.

Matching dresses out of Cream Satin and sparkly pink Chiffon. I used Sister Smocks IJ803 by Indygo Junction for my daughters dress and Baby Doll 4707 by Simplicity for the baby doll dress.

I used the same baby doll pattern as previously mentioned and the pajama pattern 4910 by Butterick for these three jammies.

The best part? I paid for the patterns (on sale at my local fabric shop) and the Tinkerbell ribbon. But other than that every piece of fabric was scraps or chunks left over from another project.
Can I say that's a good deal!?