Saturday, February 13, 2016

Sunbeam Bean Bags- LDS Primary Helps

I have a new calling in The Church of Jesus Christ of Latter Day Saints- Rosewood ward. I am one of three Sunbeam teacher. We have 11: 3-year- old children in our class. Nine of them are boys and two girls. I LOVE IT!! In January all of the 3-year-olds move from the Nursery (a free play two hours with a 20 minute lesson) to the Primary/Sunbeams (a two hour class split into a group lesson, singing time and a class lesson). It is a difficult adjustment for these kids. The first week this year we had a couple of kids that wanted to poke each other, hug each other, climb on their seats, and move around.

I thank my Heavenly Father for sending an impression to me, "they need something to keep their hands busy."

During the week I had been making and playing with the pyramid bean bags from my previous post. I was having a lot of fun with them. I had my kids outside making catapults and flinging the beanbags as far as we could. We also found an old science fair board, cut holes in it and had a beanbag toss.

So why couldn't I put the two things together?

These are the ones I started with :)

 
We learned quickly that we needed some rules to go with them.
-You have to sit on your pockets to be able to hold one of the bags.
-You can hold them with your hands or put them under your seat.
- Do not throw the beanbags.

This worked like a charm. We were able to get most of the kids to stay with us on their chairs with the chance to hold the beanbags.

After a couple of weeks the kids started getting bored of the same beanbags so we needed to evolve.

We turned it into a bit of a challenge. If they followed the rules of the beanbags they could hold the beanbag for as long as the wanted during opening exercises. During the first couple of minutes of class time they could guess what was in the beanbag. This gave me a chance to be a little creative! I started week one of this challenge with rice in the bags. That was a challenge. But I had a small plastic bag to show them what the rice looked like.

Last week we tried five marbles. This was easy for a few of them. Because I can get a little fixated at times I got to work.
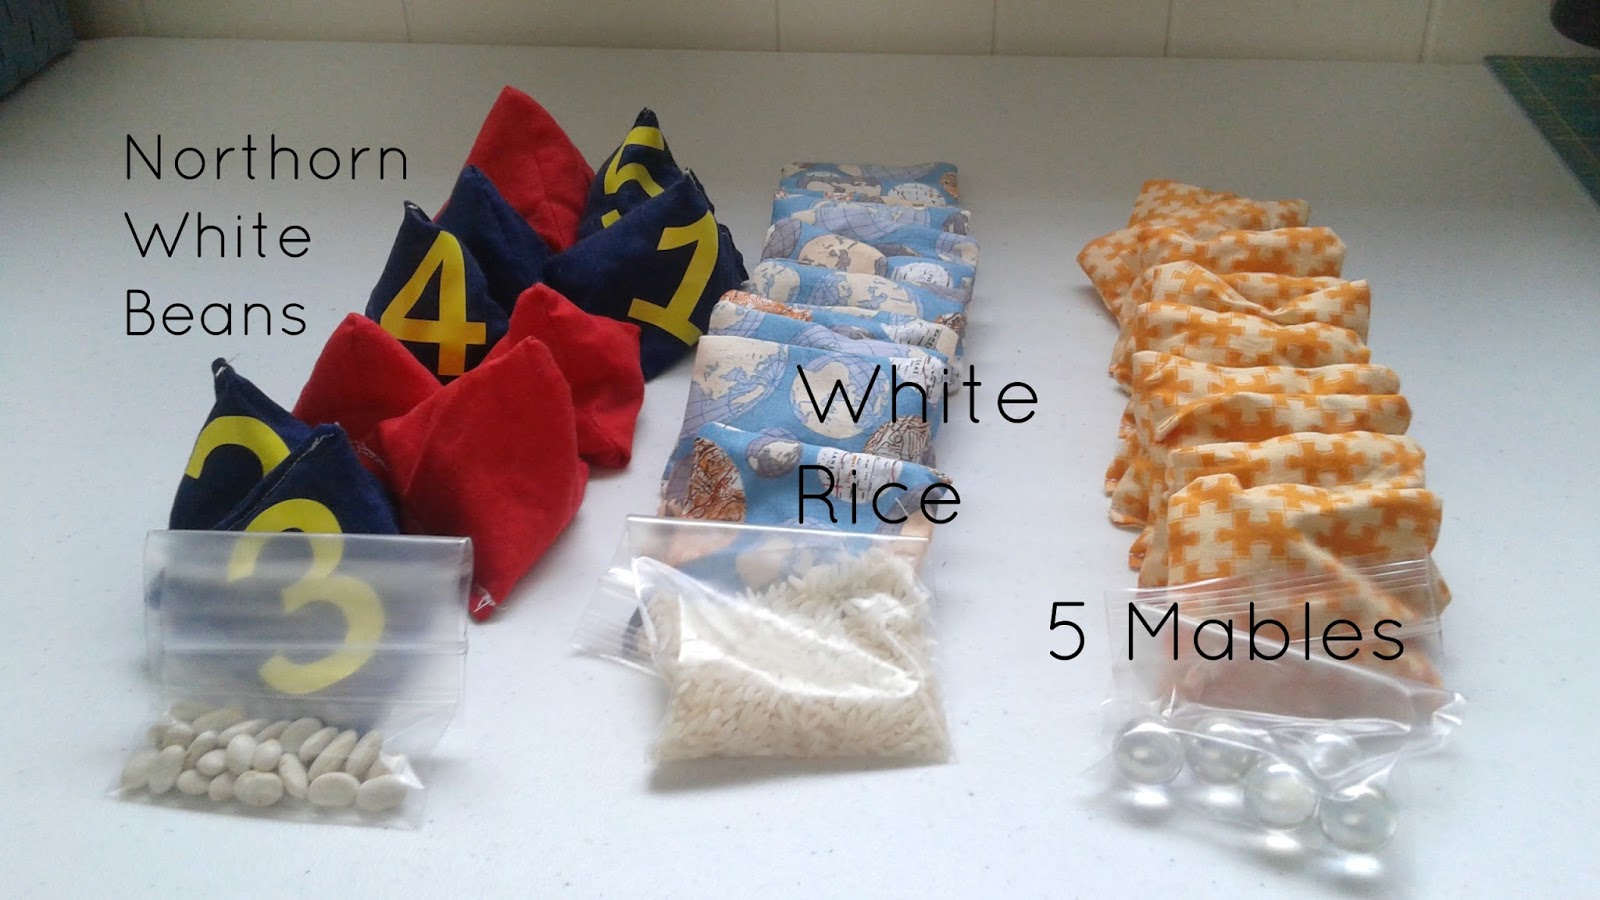

Then I needed a way to sort and store them :)


I also needed to run to the dollar store to find more things to put in my bags:
 
 
I had a few "rules" for myself this time.
-They couldn't make too much noise when pushed together
-I wouldn't mind if they got broken
-They needed to be something familiar to at least some of the kids

I'll keep you posted with how this works out.

Happy SUNBEAMing!! 


Friday, January 1, 2016

Pryamid Bean Bags

 I have been doing some research online for bean bags. I really want to make some games for my kids with them. I couldn't believe how many different ones I found. Some had streamers. Others had fun colors in all sizes. I found some that were filled with rice, beans, poly pellets and even pony beads.

The cutest ones where shaped as chickens.
-Have you seen these?


http://www.redtedart.com/2012/02/10/pyramid-juggling-bag-chickens/

I also found so many different ways to play with bean bags. I didn't know about the game known as cornhole. This is a very common tailgaters game. Definitely one to try :)

Another game I learned about is called five stones or knucklebones. This game is very similar to the one I knew as a child called Jacks. With Jacks you bounce a ball while trying to pick up the 3D shaped stars. I loved it!


I was inspired to make my own. And here's what I came up with:


I opted for a smaller size. I cut my starting fabric to 3.5" X 6.5". I love the way the numbers ended up looking so bright and bold. So far we have juggled with them, thrown them into a bucket as a basket, tossed them across the room. Next I want to try the smaller size to make my own Knucklebones/Five Stones.

Enjoy!

Tuesday, December 29, 2015

What went Wrong?? Candied Popcorn DIY Fail :)

I am a big dreamer! I had some grandiose plans for Christmas this year. I knew I could find a quick and easy candied popcorn recipe, and that I would make it just perfect the first try. I would then make batches and batches of my perfect red and green popcorn in cute little bags to my neighbors. I would send bundles with my kids to school and bring bowls to all the parties we planned to attend.

I found a great and easy recipe online. I had planned to add the link here, but I decided to protect the recipe ;) I ran to the store for supplies. I got the kids excited to help. They popped corn, and sorted out the kernels.

I started cooking...

The instructions said to heat the ingredients to a boil. That it would thicken and should take about 5 minutes. I waited and waited for it to boil. I kept checking the thickness. It seemed to stay the same consistency. The color green wasn't my favorite but I though it would lighten up once I mixed it with the popcorn. You know because the popcorn is a light color.


I spread the popcorn on the cookie sheet. Covered the popcorn with the sauce and put it in the oven. I do have to say I'm grateful for aluminum foil and the foresight to use it. The recipe said to stir the popcorn with the sauce every five minutes. After the first five minutes I started to wonder if something was wrong. After the second five minutes I knew something was wrong!


Outside to cool and straight into the trash bin it went. I then realized it was going to take a lot more practice to get my popcorn to look like the pictures I've seen on Pinterest.

I tried again and it turned out a little better this time.


Here's wishing you a HAPPY New Year!
May 2016 be full of fun activities
and lessons learned ;)

Saturday, December 5, 2015

5 Minute Drape Vest + Ombre Bleach= Cute, Quick and Cheap :)

 An afternoon with my daughter and about $2 and we came up with this cute Drape Vest that she is proud to wear and can say she helped make.


I found some shirts at Dollar Tree over a year ago. I bought two purple and two blue in my kids sizes. I was sure I could quickly personalize these shirts and they would make wonderful Christmas gifts. As life sometimes goes, I didn't get around to them. So they sat in my pile of "To Do."


I was back at Dollar Tree yesterday and found they had a few more of these shirts. Of course I got another one. Why? Well so I could add it to the pile :P Turns out this time I had a project for them. Hurray! I came home and got right to work.

First I used this tutorial to cut the shirt into a vest:


I added a couple of quick cuts and two knots to the back to add some sizing and texture.

Then we moved to the bathtub. It is way to cold outside today. My daughter and I opened the windows and closed the door to keep the smell contained in the bathroom. I didn't have my daughter work with the bleach directly. She gave me the instructions of how long to leave the shirt in the bleach water and where to place the shirt in the bleach water. After I had rinsed the bleach out of the shirt I had her wash the shirt in the sink with warm water and hand soap. She loved it!

Here's the tutorial we used to bleach the shirt for the fun color variation:


Total Cost under $2!!
The T-shirt was a dollar and some change with tax. The bleach was under a dollar as I had a big jug of it left over from another experiment.
 
We took an afternoon for the whole project. Mostly Fun Mother/Daughter time so I don't count it as an expense.


Friday, October 2, 2015

Baby Boy Cleveland Brown’s Fan From the Start


I love custom orders! The challenge came in for a Baby Boy Cleveland Brown’s Blanket. I was thrilled at the idea. Then came the chance to design. Here’s what happened:


The only thing missing is the middle name and birthdate. It was there, but for safety sake I've removed it from the image :)

Monday, September 7, 2015

New Quilt for my Niece

I come from a big family. I'm the oldest of 7 to be exact. As a kid it was hard to appreciate what my parents had given me with the addition of each new sibling. Today I am able to see the blessing of each one of their personalities, strengths and talents. They each enrich my life in a way that no one else could.
Now my life has been added to immensely with my own children, nieces and nephew. The family just keeps growing :)

This is one of my sisters with a quilt we've made for her daughter. So Exciting!!
 

Tuesday, August 25, 2015

Missing My Daisy’s

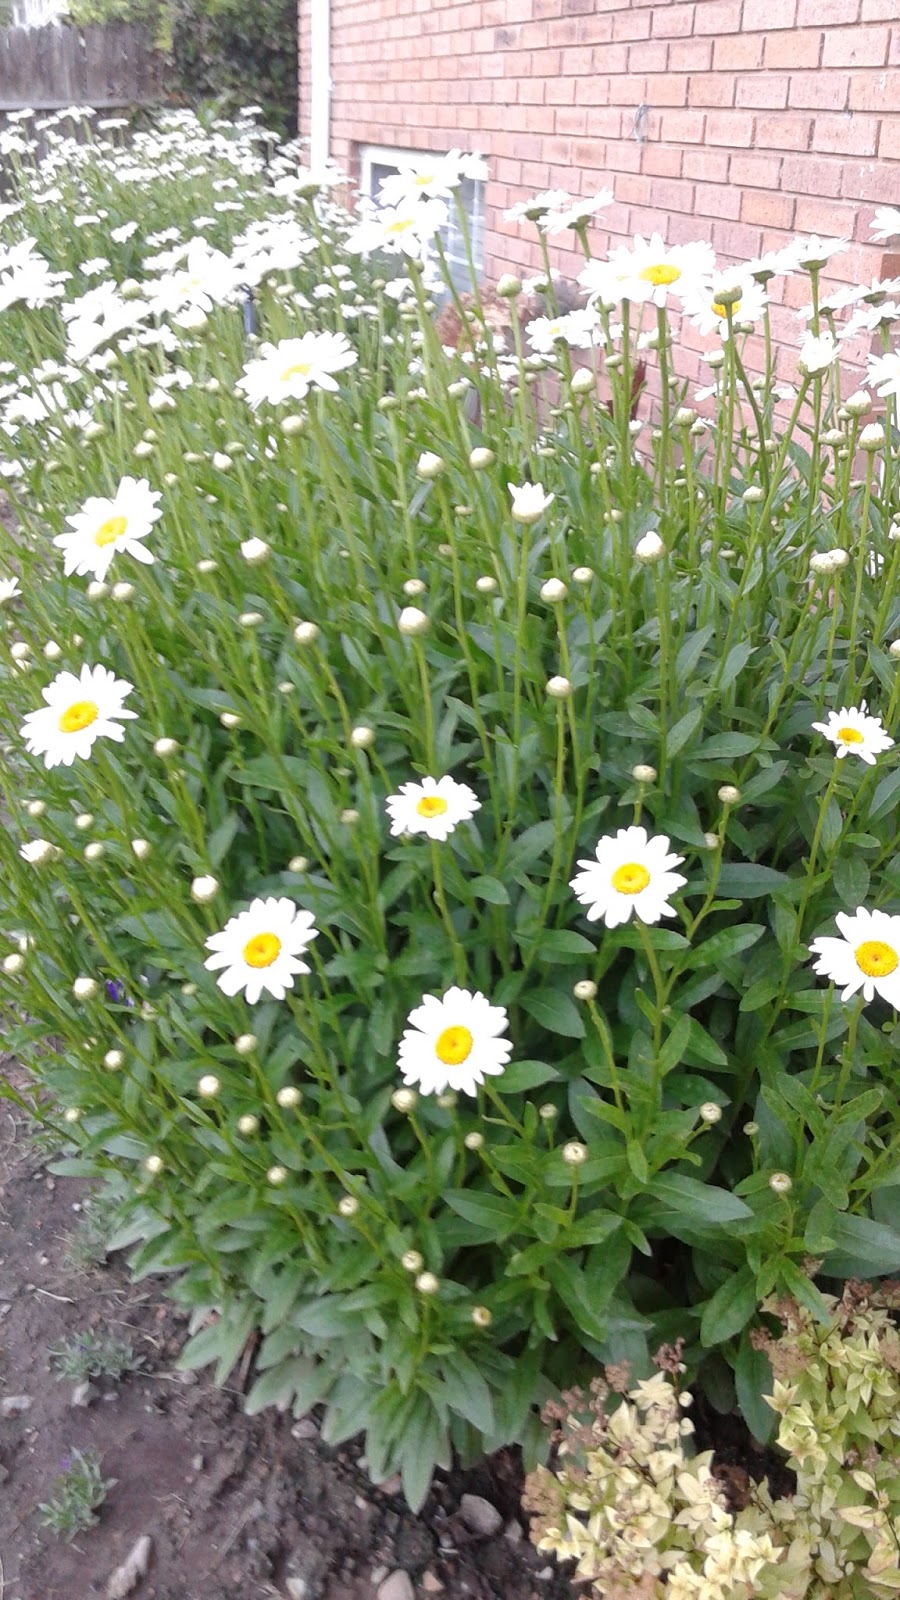
My husband can grow just about anything. He doesn't normally buy store bought flowers instead he grows them for me. This last week we needed to clean out the daisies. After cutting them off at the base I am feeling a loss for the giant bushes. In tribute to the beautiful spring flower:


Fortunately for me, the Dahlia's are starting to fill out. Hopefully between them and the mums the flower garden will soon be full again :)
 
 
Happy Fall!

Friday, November 8, 2013

Full Size Quilt- Sampler with Applique


This wonderful Full Size quilt has been a pleasure to work on! The warm colors of fall emanate from this quilt with the gentleness of yesteryear.

I used only High Quality designer cotton fabrics by Maywood Studio. The backing is one whole piece so there are no extra lines on the back. 

The batting is Warm and White 100% cotton.

It is longarm machine quilted.

The binding was attached to the top side by machine and wrapped around to the back and stitched in place by hand using coordinating thread.

I started it a year ago when I joined a Saturday quilt group. Because I am one who likes to draw outside the lines, I made a few changes to make it my own.

You can machine wash this quilt in cold water with like colors and tumble dry.

Crafted in a smoke free, clean home. Stored in a dark cool room to protect the integrity of the materials.

Made and Ready to ship!

*This is a one of a kind quilt and will not be reproduced

<a href="https://squareup.com/market/jessica-ouzts/full-size-quilt-sampler-and-applique" class="sq-embed-item">Full Size Quilt- Sampler and Applique on Square Market</a>
<script src="https://cdn.sq-api.com/market/embed.js" charset="utf-8"></script>


Friday, August 2, 2013

Back To School DIY Eternity Scarf / Necklace


In the back left hand corner you can see me... with the "necklace" to match my Maxi Skirt.

I'll have the link at the bottom of this post for you to find the DIY pattern for this fun and easy, adjustable Maxi Skirt.

Supplies:

1/4  yard- Riley Blake Navy Gray Jersey Knit 57"

  • I used the leftovers from when I made my skirt

1/4" Dowel
Standard sewing supplies


Cut:
Start by cutting 2 strips of fabric that measure about 2" X Width of the Fabric

  • If using scraps you will want the end measurement to equal about 104"
  • If you would like your scarf/necklace to be more chunky, cut the strips wider than 2"


Sew the strips together to make one long strip


Fold the strip in half lengthwise with RIGHT sides together. Sew along the long side of the strip using a Stretch or Zig Zag stitch. Sew to close ONE end of the necklace.


Turn the tube Right Side out by pushing the dowel into the sewn end of the tube.


Continue pushing until the whole tube is RIGHT side out.


Take the unfinished end of the necklace and tuck the unfinished end into the necklace about 1/2".


 Tuck the unfinished end into a folded end and sew across to secure.


Wrap the necklace three times and put it on!


See the instructions for the matching Maxi Skirt HERE

Please leave a comment and let me know how it worked for you, Have a Wonderful Day!

Wednesday, July 31, 2013

It's almost here!

My next Riley Blake Designs Tutorial is almost here!


A Back to School Maxi Skirt that's adjustable to fit the whole gang will publish Friday morning August 2, 2013. I'll post the link as soon as I can.

Also watch for the matching necklace/eternity scarf. I plan to have that posted on this page by Friday as well.

Have a wonderful day!

Wednesday, June 26, 2013

DIY Request

I am having a bloggers block. You know when you can't wait to put something up for everyone to see... yet you can't decide what to do.

My Riley Blake Tutorials are all set to go but I would love to show something here.

Any requests? I am a quilter by nature so something to do with fabric would be nice, but I love a good challenge. All requests will be considered, not all will be made :)

Friday, May 24, 2013

Tutorial Announcements

I am excited to announce that I have five Tutorials slated for Riley Blake DIY Tutorials.

DATES TO WATCH FOR

June 28th: Pillowcase dress using the "Simply Sweet" fabric line from Riley Blake. This line of fabric will be released in June


August 2nd: Circle Skirt using the Riley Blake Kit fabrics. I can hardly wait to get my hands on these :)

September 20th: Finger Puppets with "Too Cute To Spook"
November 18th: Christmas Gift bags Using "A Merry Little Christmas


Last but not least

December 30th: Reusable Grocery Bags using Riley Blake Laminate Chevrons


You can see previous posts by clicking the Riley Blake instructors button on the right hand side bar and searching: mamajamaquilts

Thanks for stopping by!

Monday, May 20, 2013

DIY Baby Bedding

I as so excited! Today my newest tutorial was posted. I am enjoying sharing my designs with you! I feel like I have a chance to inspire those who are looking for new ideas to brighten their lives and the lives of the ones they love.

This set of tutorials was for a baby quilt and matching pillow.


http://www.rileyblakedesigns.com/cutting-corners/2013/04/22/woven-ladybug-garden-baby-quilt/


http://www.rileyblakedesigns.com/cutting-corners/2013/05/20/woven-ladybug-garden-throw-pillow/

I hope you will  enjoy this project as much as I did!


DIY Kit is available at my ETSY shop: MamaJamaQuilts.etsy.com